woensdag 11 december 2019

Kraft papier en witte embossingpoeder..... 

De bruine kleur van het kraft papier en witte inkt en embossing poeder is een mooie combinatie. Door er rode accenten aan toe te voegen, krijg je een hele mooie kerstkaart.
Juist dankzij die combinatie van kleuren krijgt de kaart een elegante uitstraling. 


Kraft paper and white embossing powder .....

The brown colour of the kraft paper with the white ink and embossing powder is a nice combination. By adding red accents to it, you get a very nice Christmas card.
It is precisely this combination of colours that gives the card an elegant appearance.


donderdag 5 december 2019

Vrolijke kerstkaarten met kerstman

VROLIJKE KAARTEN MET KERSTMAN 

De Lea'bilitie van het doosje heeft naast de mal voor het doosje ook verschillende andere stansjes. Die zijn bedoeld om de cadeau doosjes mee te versieren. Natuurlijk kun je die onderdelen ook gebruiken om je kaarten mee te decoreren. Zo maak je bijvoorbeeld met de onderdelen van het kerstmannetje leuke kerstkaarten.


CHEERFULL CARDS WITH SANTA CLAUS

In addition to the die of the box, the Lea'bilitie of the box also has various other parts. They are meant to decorate the gift boxes. You can off course use those parts to decorate your cards. For example, you can make fun Christmas cards with the parts of Santa Claus.


donderdag 28 november 2019

Combi stamps

Werken met combi stamps

Elke combi stamp heeft verschillende motiefjes, die je met elkaar kunt combineren. Ik kreeg de laatste weken vaker een vraag over hoe je dat het beste kunt doen. 
Een tip: ga eens een avondje lekker 'spelen met stempels'. Dan ontdek je zoveel meer mogelijkheden van het stempelen. Het is ontspannen bezig zijn, zonder de druk van "ik moet een kaart af hebben"... 

Onze stamping tool is ideaal voor het spelen met stempels. Dan kun je een stempelafdruk die niet helemaal goed gegaan is ook weer herstellen.
Bekijk eens mijn video: 
https://www.youtube.com/watch?v=sW3pdt5ZXmA  LeCrea Stamping Tool  for clear stamps How to Do
Dan is er het trucje van het 'maskeren'. Zo kun je een figuurtje een hoedje opzetten of ergens op zetten. 
Dit toon ik in de video: https://www.youtube.com/watch?v=loZWw8vSS1I   Combi Stamps & masking

Een hele simpele manier om te combineren, die ik zelf ook heel leuk vind:
een avondje stempelen, kleuren en lekker knippen. Zo heb je een 'bakje" met motiefjes. Met al die figuurtjes kun je later combineren en ze op en achter elkaar plakken.

Als je niet van kleuren houdt..... dan neem je voor alles een zelfde kleur kaart karton. Met een bijpassende tint inkt en een gelpen, maak je zo hele mooie stijlvolle kaarten.
Kortom heel wat mogelijkheden om met deze combistamps aan het werk te gaan! 


Working with combi stamps

Each combi stamp has different motifs that you can combine with each other. In the last few weeks I have received a question about how you can best do that.

A tip: have a nice evening playing 'with stamps'. Then you discover so many more possibilities of stamping. It's about being relaxed without the pressure of "I need a card" ...

Our stamping tool is ideal for playing with stamps. Then you can restore a stamp print that did not go well.
Take a look at my video: https://www.youtube.com/watch?v=sW3pdt5ZXmA LeCrea Stamping Tool for clear stamps How to Do

Then there is the trick of 'masking'. This way you can put on a hat or put it on something.
I show this in the video: https://www.youtube.com/watch?v=loZWw8vSS1I Combi Stamps & masking

A very simple way to combine, which I also really enjoy: an evening of stamping, coloring and nice cutting. This way you have a 'bowl' with motifs. You can combine them later with all those figures and stick them on and behind each other.

If you don't like colors ..... then take the same color card for everything. With a matching shade of ink and a gel pen, you can make beautiful, stylish cards.
In short, a lot of possibilities to get to work with these combistamps!


dinsdag 22 oktober 2019

Kaart met een 'doorkijkje'

KAART MET EEN 'DOORKIJKJE'

De stans en de bijpassende stempel van de kerstornamenten kun je gebruiken om een kaart te maken met een verrassende 'doorkijkje'. Door vliegerpapier of zijdevloei te gebruiken, kun je deze kaart namelijk gebruiken als een klein lantaarntje, door er een waxinelichtje achter te zetten.

Gebruik het stansje van het gewenste ornament en stans de ballen uit de kaart.
Snijd van het vliegerpapier of zijdevloei een rechthoek die achter de kaart past. (met de fotorandschaar krijgt dit een mooi 'afgewerkt randje').  Leg de rechthoek achter de kaart en geef met enkele kleine potloodpunten de uitsnede aan. 
Stempel de bij de opening passende kerstbal op de aangegeven plek. Zet het papier vervolgens achter de kaart vast.


CARD WITH A 'VIEW'

You can use the die and the matching stamp of the Christmas ornaments to make a card with a surprising 'look through'. By using kite paper or silk tissue, you can  put a tea light behind it and create that way a kind of lantern.

Use the die of the desired ornament and cut the ornaments out of the card.
Cut a rectangle from the flyer paper or silk paper that fits behind the card. (with the 'photo border' scissors this will get a nice 'finished edge'). Place the rectangle behind the card and indicate the cut-out with a few small pencil points.

Stamp the Christmas ornament that matches the opening at the indicated location. Then secure the paper behind the card.

woensdag 9 oktober 2019

Label met uiltjes

LABEL MET UILTJES 

Een kraft label kan ook een leuke basis zijn voor een kerstkaart.
Met de stempel van de 'stofjes' en de template heb ik de basis versierd. Het is heel leuk om hier een beetje mee te spelen. Voor een dergelijke basis is het niet nodig, om dat allemaal zo heel precies te doen. De stempel heeft ook diverse soorten 'stiksteekjes' die je kunt gebruiken om langs de rand van het label te stempelen.

LABEL WITH OWLS

A label of craftpaper can also be used as a base for a Christmas card.
With the stamp of the 'fabrics' and the template I have decorated the base. It is fun to play around with ink. For a base like that it is nice not to do all that precisely. On the stamp you will find several images of  'stitching lines' that you can use to stamp along the edge of the label.


donderdag 3 oktober 2019

Schaapjes....

SCHAAPJES VAN WATTENSCHIJFJES..... 

De Lea'bilitie van het doosje heeft diverse onderdelen om het doosje leuk te versieren. Daarbij zijn er onderdelen om een doosje te veranderen in een schaapje. Dat is een leuke party favour voor een baby shower.
Met deze stans kun je natuurlijk ook leuk kaarten maken, zoals deze kaart met de schaapjes.
Voor het lijfje van de schaapjes gebruik je een van de spirella rondjes. Om het een leuk plush gevoel te geven, kun je het lijfje ook uit een wattenschijfje stansen....

SHEEP OF COTTON PAD.....

The Lea'bilitie of the box has various parts to decorate each box nicely. In addition, there are parts to turn a box into a sheep. That is a nice party favor for a baby shower.
Of course you can also make fun cards with this die, such as this card with the sheep.
Use one of the spirella circles for the sheep's body. To give it a nice plush feeling, you can also cut the body out of a cotton pad ....


donderdag 26 september 2019

Baby Diaper

BABY DIAPER op een EASEL CARD

Met de afbeeldingen van de babies of de luier maak je leuke 'easelkaarten'. In de luier is plaats voor een kaartje met een passende tekst. Natuurlijk is een baby ook een leuke variatie om op deze kaart te gebruiken.

Als basis gebruikte ik de geschulpte rondjes van de Spirella stans als basis voor deze kaarten.
* Vouw karton dubbel. Leg de stans van een kleine cirkel erop, laat de stans iets over de gevouwen rand uitsteken. Snijd deze "dubbele' cirkel uit.
* Vouw een kant van deze cirkel dubbel.
* Stans nogmaals een cirkel van dezelfde maat uit het karton.
* Plak deze (enkele) cirkel op het omgevouwen deel van de dubbele cirkel. Zo ontstaat een standaard.
* Snij een grote cirkel als basis. Plak het standaardje op de basis cirkel.
* Versier de 'easelkaart' met een luiertje of een van de babies.
Veel succes!

BABY DIAPER on an EASEL CARD
With the images of the babies or the diaper you can make fun 'easel cards'. In the diaper there is room for a card with an appropriate text. Of course a baby is also a nice variation to use on this card.

As a basis I used the scalloped circles of the Spirella die as the basis for these cards.

* Fold cardboard in half. Place the die of a small circle on it, let the die protrude slightly over the folded edge. Cut out this "double" circle.
* Fold one side of this circle in half.
* Die-cut another circle of the same size from the cardboard.
* Stick this (single) circle on the folded part of the double circle. This creates a stand.
* Cut a large circle as a base. Glue the stand on the basic circle.
* Decorate the 'easel card' with a diaper or one of the babies.
Good luck!

woensdag 18 september 2019

Kerstkaarten met een vleugje humor

KERSTKAARTEN MET EEN VLEUGJE HUMOR 

De stansen en stempels van de kerstornamenten kun je ook op een hele leuke manier combineren met de stempels van de uiltjes. Laat ze op de ornamenten zitten of stop ze "erin', laat ze samen een kerstbal tillen....
De uiltjes geven een Kerstkaart net even een klein vleugje humor......


CHRISTMAS CARDS WITH A BAT OF HUMOR

The Lea'bilitie dies and stamps of the Christmas ornaments can also be combined in a very nice way with the stamps of the owls. Put an owl on top of an ornament, or put them "in" a christmas ball.... let them carry together an ornament.....
The owls give a Christmas card just a little bit of humor ......


donderdag 12 september 2019

De Uiltjes op Kerstkaarten

DE UILTJES OP KERSTKAARTEN 

De uiltjes zijn voor zoveel gelegenheden in te zetten. Het is een kwestie van combineren met een van de vele andere combistamps. Ik vind het heerlijk om een avondje lekker te stempelen. Dan leg ik maar enkele stempels op tafel met enkele voorgesneden kaartjes. Ik merk dat je dan veel meer uit de stempels haalt. Je ziet steeds meer leuke combi mogelijkheden.
Een ander moment gebruik ik deze gestempelde kaartjes op een wenskaart.
Op die manier is stempelen een leuke ontspannen bezigheid.....


THE OWLS ON CHRISTMAS CARDS

The owls can be used for so many occasions. It is a matter of combining with one of the many other combi stamps. I love to sit down an evening just stamping. I only put a few stamps on the table with some pre-cut cards. I notice that you get a lot more out of the stamps this way. You see more and more nice combi options.

Another time I use these stamped cards on a greeting card. That way stamping becomes a nice relaxing activity .....

woensdag 28 augustus 2019

Uiltjes op een lijntje

UILTJES OP EEN LIJNTJE 

Gezellig op een lijntje, samen een kerstboom tillen, een verjaardagstaart dragen, of samen verhuizen.....
Dat kun je deze uiltjes allemaal laten doen. Het is een kwestie van stempelen, maskeren of uitknippen en lekker combineren. Deze uiltjes kun je namelijk weer allemaal met mijn overige combi stamps combineren.
Zelf vindt ik het heerlijk om eens een avondje lekker te zitten kleuren. Dus ik stempel heel veel items op een aquarel vel. Zo nu en dan knip ik deze afbeeldingen dan allemaal uit. Dat is een leuk werkje als je een keer niet veel 'rommel' op tafel wilt hebben, buiten onder de parasol, of lekker op de bank.
Dan heb ik een lekker voorraadje om heerlijk te spelen en te combineren.
Leuke bijkomstigheid..... als je een keer snel een kaartje klaar moet hebben, ben je ook zo klaar!

OWLS ON A LINE

Cozy on a line, lifting a Christmas tree together, carrying a birthday cake, or moving together .....

You can have all these owls do that. It is a matter of stamping, masking or cutting out and combining nicely. You can combine all these owls with the images of my other combi stamps.
Personally, I love to spend a nice evening coloring. So I stamp a lot of items on a watercolor sheet. Every now and then I cut these images out. That's a nice job if you don't want to have a lot of 'junk' on the table, outside under the parasol, or on the couch.
Then I have a nice supply to play and combine with.

Nice side effect ..... if you have to make a card quickly, you will be ready in no time!


donderdag 8 augustus 2019

Patch Die butterfly

PATCH DIE BUTTERFLY 

De Patch Die van de vlinder kun je op zoveel verschillende manieren gebruiken.
Er is een basis, die je uit stevig papier stanst. Daarnaast is er een stans met alle losse onderdelen. Hiervoor kun je gekleurd papier, bestempeld papier of Glitter Foam gebruiken.
De losse onderdelen plak je terug op de basis van de vlinder.

Een mooi effect krijg je door de basis een extra keer te stansen. Deze zet je dan onder de vlinder vast voor een mooi 'schaduw' effect.
Een andere leuke manier om deze stans te gebruiken is met plakfolie. Stans de losse onderdelen uit dubbelzijdig plakfolie en gebruik daarop gekleurd zand (Sandy art, JeJe) om de onderdelen te versieren.
Kortom dit stansje kun je op heel veel creatieve manieren gebruiken.

PATCH THAT BUTTERFLY
The Patch of the butterfly can be used in so many different ways.
There is a base that you cut out of sturdy paper. In addition, there is a Die with all individual parts of the wings and body. You can use colored paper, stamped paper or Glitter Foam for these parts.
Stick the loose parts back onto the base of the butterfly.

You get a nice effect by cutting out the base an extra time. You put this under the butterfly for a nice 'shadow' effect.
Another nice way to use this die is with adhesive film. Die-cut the individual parts from double-sided adhesive foil and use colored sand (Sandy art, JeJe) to decorate the parts.
In short, you can use this Lea'bilitie Die in many creative ways.


donderdag 25 juli 2019

Coffee time

COFFEE TIME
Zomer betekend voor heel wat mensen vakantie tijd. Maar ook voor de thuisblijvers kan dit een periode zijn, dat je even wat meer tijd hebt voor jezelf.
Een goede reden om een keertje bij te praten met vriendinnen. Leuk om ze met een mooie kaart uit te nodigen voor een ontspannen koffie momentje.

COFFEE TIME
For many people, summer means vacation time. But for those staying at home this can also be a time that you have a little more time for yourself.
A good reason to catch up with friends sometime. Nice to invite them with a nice card for a relaxing coffee moment.

woensdag 17 juli 2019

Serviesje

Combi stamp SERVIES

Het servies is voor heel wat gelegenheden te gebruiken. Het zijn allemaal losse onderdelen dus geschikt om een klein label te maken, of een leuke kaart.
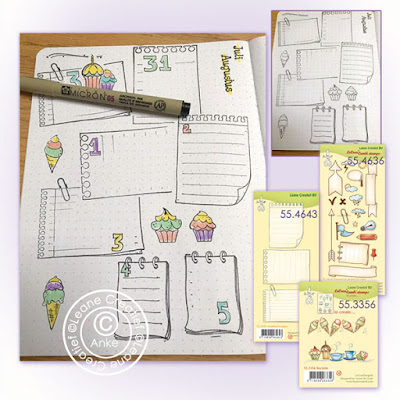
Bovendien zijn de stempeltjes ook heel leuk om een pagina in je bullet journal mee op te vrolijken.

Combi stamp SERVIES

The service can be used for many occasions. They are all separate parts so suitable for making a small label or a nice card.
Moreover, the stamps are also great to cheer up a page in your bullet journal.

dinsdag 25 juni 2019

Bullet Journaling met Combi stamps

BULLET JOURNALING met COMBI STAMPS 

Bij de combistamps vindt je diverse afbeeldingen en thema's die je heel goed in je bullet journal kunt gebruiken. Kleur ze in, of stempel enkel met zwart of een andere kleur.
De afbeeldingen van de combi stamps kun je heerlijk met elkaar combineren. Zo maak je snel een leuk begin van een pagina.

BULLET JOURNALING with COMBI STAMPS

Within the combi stamps you will find various images and themes that you can use very well in your bullet journal. Colour them in, or stamp just with black or another color ink.
You can combine the images of the combi stamps with each other. This way you can quickly start a nice page.


woensdag 19 juni 2019

Verjaardagstaart en confetti

VERJAARDAGSTAART EN CONFETTI 

De verjaardagstaart wordt extra vrolijk als je er een leuke achtergrond achter hebt. Met de template van de stippen, maak je eenvoudig een achtergrond met confetti. Gebruik diverse kleuren inkt en een sponsje. Let op, begin met de lichtste tint en werk zo door naar de donkere tinten.
Je kunt het stencil dan op de kaart laten liggen en je loopt niet het risico, dat de lichte inktkussens worden 'vervuild' door een van de donkere kleuren.

Met diverse kleuren inkt werken, geeft ook een leuk effect bij de bloemetjes van dit sjabloon..
Succes!

BIRTHDAY TAIL AND CONFETTI

The birthday cake will be extra cheerful if you have a nice background behind it. With the template of the dots, you can easily create a background with confetti. Use various colors of ink and a sponge. Note, start with the lightest shade and work on to the darker shades.
You can then leave the stencil on the card and you do not run the risk that the light ink pads are 'contaminated' by one of the dark colors.

Working with various colors of ink also gives a nice effect to the flowers of this template.
Good luck!


donderdag 13 juni 2019

Paper Patch vlinder van Foam

PAPER PATCH VLINDER van FLOWER FOAM 

De Lea'bilitie van de paper patch butterfly kun je uit papier stansen, maar ook uit Flower Foam en Glitter Foam. Met al die kleuren en structuren wordt iedere vlinder kleurrijk en verschillend.
Zo krijg je een hele leuke decoratie voor op kaarten, labels of om in een bullet journal te plakken.

Stans met de stans voor de losse onderdelen, de vlinder uit enkele kleuren papier of foam. Mix en match alle onderdelen weer tot een nieuwe kleurrijke vlinder. Gebruik je bijvoorbeeld drie soorten of kleuren, dan krijg je uiteindelijk ook 3 verschillende vlinders. Plak ze allemaal op een basis vlinder. Bewaar de vlinders die over zijn, voor een moment, dat je echt haast hebt om een kaart te maken.....

PAPER PATCH BUTTERFLY from FLOWER FOAM

You can use the Lea'bilitie of the paper patch butterfly for paper, but also with Flower Foam or Glitter Foam. With all those colors and structures, every butterfly becomes a colorful and different looking decoration.
This way you get a very nice decoration for cards, labels or to paste in a bullet journal.

Die-cut with the die for the individual parts, the butterfly from a few colors of paper or foam. Mix and match all parts again into a new colorful butterfly. For example, if you use three types or colors, you will eventually get 3 different butterflies. Stick them all on a basic butterfly. Save the butterflies that are left over, for a moment that you are really in a hurry to make a card .....


woensdag 5 juni 2019

Combi Stamps en Bullet journaling

COMBI STAMPS EN BULLET JOURNALING 

De combi stamps zijn een leuke aanvulling om je bullet journal mee te decoreren. Bij de combi stamps zijn een groot aantal afbeeldingen te vinden, die te maken hebben met het dagelijkse leven. Voor de diverse seizoenen, feestjes enz. is er wel een leuk figuurtje over te vinden.
Daarnaast zijn er ook een aantal stempels met de weekdagen/ maanden/ seizoenen, die je helpen als je even snel een pagina wilt voorbereiden.
Kijk eens bij alle stempels op onze website.

COMBI STAMPS and BULLET JOURNALING 

The combi stamps are a nice addition to decorate your bullet journal. At the combi stamps a large number of images can be found that are related to daily life. For the various seasons, parties, etc., there is a nice figure about it.

In addition, there are also a number of stamps with the weekdays / months / seasons that help you if you want to prepare a page quickly.

Take a look at all stamps on our website.


donderdag 9 mei 2019

BIRTHDAY CAKE POP-UP KAART 

De silhouette stansen zijn op heel wat manieren te gebruiken. Een hele leuke toepassing is die van de pop-up kaart.
Het steuntje maak je door 2x in te knippen aan de kant van de vouw van de dubbelgevouwen kaart.
Het flapje dat zo ontstaat vouw je naar binnen toe. Dit is de steun voor het silhouette deel.
De kaart kun je verder aan de buitenzijde met papier beplakken.

Voor de voorzijde van de kaart gebruik je een opleg vel waar je het silhouet van de cake uit stanst.
Met mooie letters of stempels kun je de kaart verder nog versieren.

BIRTHDAY CAKE POP-UP CARD

The silhouette Dies can be used in many ways. A very nice application is that of the pop-up card.
You can make the support voor the silhouette by cutting 2 times on the side of the fold of the folded card.
Fold the flap that is created that way inwards. This is the support for the silhouette part.
Use decorated paper to cover the card on the outside and inside. 

For the front of the card, use a rectangle in the proper size and cut out the silhouette of the cake.
You can decorate the card with beautiful letters or stamped text.


dinsdag 16 april 2019

Paaskaart

PAASKAART: eenvoudig maar wel leuk

Nog even een kaart voor Pasen maken is niet zo moeilijk. Zoek wat leuke restjes papier en stans het ei diverse keren uit. Leg de eieren in een mooie cirkel en markeer de plaats met een dun potloodlijntje. Haal nu de eitjes weg.
Gebruik de takjes en kleine bloemen van de stempels om een leuke achtergrond te stempelen.
Met de stampingtool is dit een eenvoudig werkje. Als de achtergrond klaar is, plak je de eieren op zijn plek.

EASTER CARD: simple but fun

Making a card for Easter is not that difficult. Find some nice scraps of paper and punch the egg out several times. Place the eggs in a circle and mark the place with a thin pencil line. Remove the eggs now.
Use the branches and small flowers of the stamps to stamp a nice background.
This is a simple job with the stamping tool. When you have created the background you stick the eggs in place. 

woensdag 10 april 2019

Een knipoog naar de lente...

EEN KNIPOOG NAAR DE LENTE.....

Een vrolijke kaart met een lentegevoel. De bloemen zijn deze keer gemaakt van papier. Met de stempel van de fantasie bloem, kun je de blaadjes een leuke structuur geven.
Deze mandala stempel kun je bovendien ook als een mooie achtergrond voor een kaart gebruiken.
De Lea'bilitie van de uil kun je op verschillende manieren gebruiken, dankzij de losse onderdelen.

A wink to spring .....

A cheerful card with a spring feeling. The flowers are this time made out of paper. With the stamp of the fantasy flower, you can give the leaves a nice structure.
You can also use this mandala stamp as a nice background for a card.
You can use the Lea'bilitie of the owl in different ways, thanks to the separate parts.


woensdag 3 april 2019

Nested Die Flowers

Nested Die Flowers 

Je krijgt een hele leuke moderne look als je met deze Lea'bilitie bloemen uit verschillende soorten materialen stanst. Stans uit restjes karton, foam, design papier of papier dat je zelf gekleurd hebt een aantal bloemen van diverse groottes. Daarna ga je door wat passen en meten er bloemen van maken. Met een mooie brad of met wat plakparels maak je de bloemen af.
Zo ontstaan leuke moderne maar ook kleurrijke bloemen. Met een eigen gemaakte tekst maak je zo een originele kaart.

Nested Die Flowers

You get a very nice modern look when you cut flowers from different types of materials with this Lea'bilitie. Use scraps of cardboard, foam, design paper or paper that you have colored yourself and cut out a large number of flowers of various sizes. Mix and match and create flowers. Finish the flowers with a nice brad or with some sticky pearls.
This creates nice modern but also colorful flowers. With your own text you create in an easy way an original card.


woensdag 20 maart 2019

Van Harte

VAN HARTE 

Met de handlettering templates kun je alle gewenste teksten op een kaart 'schrijven', die je nodig hebt.
Zoals in het filmpje over de templates te zien is, kun je de letters naar keuze ook met mooie krullen of strakke decoratie streepjes versieren. Je kunt de letters natuurlijk ook zonder deze decoraties gebruiken. Zoals te zien is op deze verjaardagskaart.
Met behulp van de positie stippen, staat de tekst niet alleen op een mooie rechte lijn, maar is er een mooie gelijkmatige verdeling van de letters mogelijk.

Meer weten, bekijk dan nog een keer het filmpje over deze templates:
https://www.youtube.com/watch?v=NmTOMto3S3E    LeCreaDesign Handlettering Templates


HAPPY BIRTHDAY 

With the hand lettering templates you can 'write' all the desired texts you need on your cards.
As you can see in the video about the templates, you can also decorate the letters of your choice with beautiful curls or clean decorative stripes. You can of course use the basic letters without these decorations. As can be seen on this birthday card.

With the help of the position dots you position the text on a straight line. Next to that, a nice even distribution of the letters is possible.

To know more, check out the movie about these templates again:
https://www.youtube.com/watch?v=NmTOMto3S3E    LeCreaDesign Handlettering Templates


donderdag 14 maart 2019

Uiltjes op embossing achtergrond

UILTJES OP EMBOSSING ACHTERGROND 

De uiltjes van deze combi stempel kunt u steeds anders uit laten zien. Door de losse onderdelen met elkaar te combineren zien ze er steeds anders uit.
De achtergrond van deze kaart is gemaakt met de embossing folder. Voor dit effect heb ik de hoge delen van de embossing folder geĆÆnkt. Dat moet je heel voorzichtig doen, om de diepe delen te vermijden. Daarna leg je het papier erop en draai je hem door de machine.
De inkt gaat nu in de dieper gelegen delen van het papier zitten. Dus je gebruikt hierbij eigenlijk de
'achterkant van het papier". De hoge reliƫf delen zitten aan de andere kant.
Het geeft een speels effect.
Meer van de techniekjes met embossingfolders zijn te zien in mijn video:

OWLS ON EMBOSSING BACKGROUND

You can always create different owls with this combi stamp. By combining the individual parts together, the owls always look different.
The background of this card is made with an embossing folder. For this effect I inked the high parts of the embossing folder. It has to be done carefully, to avoid inking the lower parts. Then put the folder with the paper through the machine.

The ink now settles in the deeper parts of the paper. So you actually use the "back of the paper". The high raised parts are on the other side. It gives a playful effect.
More of the techniques with embossing folders can be seen in my video:


woensdag 27 februari 2019

Lea'bilitie Silhouette Die Birthdaycake

Lea'bilitie Silhouette Die Birthdaycake 

Deze stans heeft drie onderdelen. Voor deze kaart gebruik je eerst de lange border stans. Zorg ervoor, dat de afstand van de vouw tot aan het stansje bovenaan de kaart, net zo groot is als aan de onderzijde. Het mesje moet 'recht' liggen.
Stans zo een stukje van de voorzijde van de kaart weg.

Leg nu het stansdeel met de silhouette van de taart precies langs het randje. Zet het vast met een stukje tape en stans de taart.
Voor het roze velletje onder de taart, stans je met de derde mesje de omtrek van de taart uit roze papier. Plak dit achter de voorzijde van de kaart.
Met een passend vel tegen de achterzijde van de kaart wordt het een feestelijk geheel.
Maak de kaart af met zelfgemaakte vlaggetjes en een passende tekst.


Lea'bilitie Silhouette Die Birthdaycake 
This punch has three parts. For this card you first use the long border die. Make sure that the distance from the fold to the die at the top of the card is just as large as on the bottom. The blade must lay 'straight'. Cut away a piece from the front of the card.

Now place the part of the die with the silhouette of the cake exactly along the edge. Secure it with a piece of tape and cut out the cake.

For the pink sheet underneath the cake, cut out the outline of the cake from pink paper with the third part. Stick this behind the front of the card.

With a matching sheet against the back of the card it becomes a festive card. Finish the card with self-made flags and an appropriate text.


woensdag 20 februari 2019

Kaart voor mannen

KAART VOOR MANNEN 

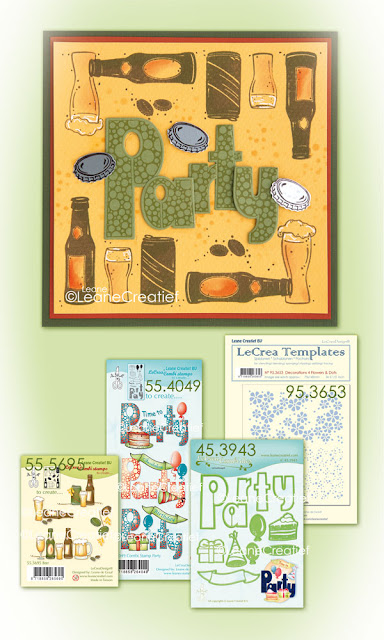
Met deze stempel van het bier is het zeker niet moeilijk om een kaart voor een man te maken.
In dit geval heb ik aan de boven en onderzijde een rij gemaakt met afbeeldingen.
Dat is natuurlijk heel gemakkelijk als je de stamping tool gebruikt. Dan kun je de kaart omdraaien en de afbeelding aan de bovenzijde op de zelfde plaats stempelen.

Voor het flesje met het glas erachter heb ik gebruik gemaakt van de techniek van maskeren.
De gouden regel is: alles wat vooraan staat, stempel je als eerste.
Voor het 'masker" stempel je het flesje op een post-it velletje en knip je dit uit.
Stempel het flesje op de kaart. Dek dit af, door het post-it flesje eroverheen te plakken.
Stempel nu het glas. Het masker vangt de 'lijntjes die niet nodig zijn van het glas"op.
Dus als je het post-it flesje nu optilt, zie je dat het glas 'achter' het flesje staat.
Over het maskeren heb ik een video gemaakt. Kijk hiervoor eens op:


Card for men

With this stamp of beer it is certainly not difficult to make a card for a man. In this case I have made a row with pictures at the top and bottom. That is of course very easy if you use the stamping tool. Then you can turn the card over and stamp the image on the top in the same place.

For the bottle with the glass behind, I used the technique of masking.
The golden rule is: everything that is in front, you stamp first.
For the 'mask', stamp the bottle on a post-it sheet and cut it out.
Stamp the bottle on the card. Cover this by sticking the post-it bottle over it.
Now stamp the glass. The mask captures the "lines that are not needed from the glass".
So if you lift the post-it bottle now, you see that the glass is 'behind' the bottle.
I made a video about masking. Look at this:


donderdag 7 februari 2019

Lea'bilitie Silhouette Die & Foil

LEA'BILITIE SILHOUETTE DIES & FOIL

De Lea'bilitie silhouette Dies kun je op heel veel manieren gebruiken.
Een hele mooie mogelijkheid van deze stansjes is de combinatie met folie en de go press & foil machine. Het effect van het folie is heel elegant. Hoe het werkt laat ik zien in de nieuwe video:
https://www.youtube.com/watch?v=dy1omhwhuMA Lea’bilitie Silhouette Dies & Foil

Daarnaast zijn er natuurlijk nog meer mogelijkheden. Daar heb ik ook een video over gemaakt. Kijk daarvoor naar de video: Lea'blitie Silhouette Die Tulip

LEA'BILITION SILHOUETTE DIES & FOIL The Lea'bilitie silhouette Dies can be used in many different ways. A very nice possibility of these dies is the combination with foil and the go press & foil machine. The effect of the foil is very elegant. How it works shows me in the new video: https://www.youtube.com/watch?v=dy1omhwhuMA Lea'bilitie Silhouette Dies & Foil In addition, there are of course more possibilities. I also made a video about that. Take a look at the video: Lea'blitie Silhouette Die Tulip


donderdag 31 januari 2019

Stempel Plezier

STEMPEL PLEZIER 

Met de stempels van de uiltjes, de klokken, het bier en de muziek noten, kun je heerlijk 'spelen'. Alle combinatie stempels kun je met elkaar combineren. Zo maak je verrassende kaarten.

De muziek stempels zijn ideaal om een achtergrond mee te maken. In een zachte bijpassende kleur gestempeld, kun je lege plekjes op je kaarten heel subtiel opvullen. Ook de klokken kun je op die manier gebruiken. Hoewel deze ook zoals op deze kaart een hoofdrol kunnen spelen.
De uiltjes kun je net als mijn ladybugs van alles "in hun vleugels geven".... Zo kun je ze gebruiken op kaarten voor diverse gelegenheden.
Kortom, met dit stel stempels maak je telkens weer originele kaarten.


STAMP FUN 

You can 'play around' with these stamps of the owls, the clocks, the beer and the music symbols. You can combine all combination stamps with each other. That way you make surprising cards.

The music stamps are ideal for creating a background. Stamped in a soft matching color, you can fill in empty spots on your cards in a very subtly way. You can also use all clocks that way. Although these can also play a major role, as on this card.

You can give he owls (just like with the stamps of my ladybugs) all kind of things to carry.... So you can use them on cards for various occasions.
In short, with this set of stamps you make each time different but original cards.


donderdag 24 januari 2019

Sneeuwpret

SNEEUWPRET

De sneeuw brengt naast heel veel file ook best heel wat pret met zich mee.
Het was de tijd voor sneeuwpoppen, dus daarom tijd om ook een leuke winterse kaart te maken.
De set van de Lea'bilitie sneeuwman en de bijpassende clear stamp van de sneeuwman zijn een leuke basis voor dergelijke kaarten.

Als achtergrond is op deze beide kaarten de embossing folder van de crystallen gebruikt. Een leuke variatie zijn de gescheurde strookjes papier.
Zo maak je al gauw een leuke kaart die past in deze winterse tijd.


SNOW FUN

The snow also brings a lot of fun along with a lot of traffic.
It was the time for snowmen, so therefore time to make a nice winter card.

The set of the Lea'bilitie snowman and the matching clear stamp of the snowman are a nice basis for such cards. 

The embossing folder of the crystalls is used as background on these two cards. A nice variation are the torn strips of paper.
This way you quickly make a nice card that fits in this winter time.


donderdag 17 januari 2019

Silhouette die Tulip 45.5626

SILHOUETTE DIE TULIP 

De Lea'bilite silhouette dies zijn nieuwe dies met leuke mogelijkheden. In het nieuwe assortiment is er de silhouette die Tulip en de silhouette die Birthdaycake. Iedere Silhouette die bestaat uit 3 aparte delen, waarmee je op verschillende manieren kunt werken. Iedere werkwijze heeft een hele andere kaart als resultaat.

De silhouette dies zijn heel goed te combineren met mooi designpapier, de diverse templates en stempels, waarmee je een mooie achtergrond maakt. Ook papier, waarop je met inkt hebt 'gespeeld', vormt een mooie basis om met deze stansen op te werken.
Op mijn YouTube kanaal heb ik zojuist een video geplaatst met aanwijzingen en voorbeelden, hoe je met deze Lea'bilitie dies kunt werken:
https://www.youtube.com/watch?v=ukzSmzeMiUs  Lea’bilitie Silhouette Die Tulip 45.5626  

Neem een kijkje en ontdek hoe verrassend leuk deze Silhouette dies zijn..... 


SILHOUETTE DIE TULIP

The Lea'bilite silhouette dies are a new kind of dies with great possibilities. In the new assortment there is the silhouette die of a Tulip and the silhouette die of a Birthdaycake. Each Silhouette die consists of 3 separate parts, with which you can work in different ways. Every method has a completely different card as a result.

The silhouette dies can be combined very well with beautiful design paper, the various templates and stamps, with which you create a beautiful background. Also paper on which you have 'played' with ink, is a nice basis to work with these dies.

On my YouTube channel I have just posted a video with instructions and examples, how you can work with this Lea'bilitie dies:
https://www.youtube.com/watch?v=ukzSmzeMiUs  Lea’bilitie Silhouette Die Tulip 45.5626 

Take a look and discover how surprisingly this Silhouette dies .....